Nugroho's blog.: microcontroler
Showing posts with label microcontroler. Show all posts

Monday, May 11, 2015

Getting Started with AtTiny13A on My Macbook Air with Yosemite


 After several success attempt with arduino mini and nano (both using ATMega328), I’m curious about programming some chip in assembler. Yeah, I know we could use arduino board to do it. But I prefer to do it the “right way”, as pure assembler novice, :) 

So I grab the 1$ ATTiny13A and 2$ USBASP knockoff. Almost forgot the second as I think I already have one used on my Arduino Pro Mini (no, it’s USB-to-TTL, PL2303HX, only have vcc-gnd-tx-rx pins, completely different device).

Turn out that my ‘other’ have some use in my system (my usbasp couldnt provide 5v power, atleast at my system, so I use usb-to-ttl instead)

USBASP already detected on My Macbook Air, so no driver needed, :)


Test Programmer and connectivity

Nugrohos-MacBook-Air:ATTiny nugroho$ avrdude -p t13 -c usbasp

avrdude: warning: cannot set sck period. please check for usbasp firmware update.
avrdude: AVR device initialized and ready to accept instructions

Reading | ################################################## | 100% 0.00s

avrdude: Device signature = 0x1e9007

avrdude: safemode: Fuses OK (H:FF, E:FF, L:6A)

avrdude done.  Thank you.

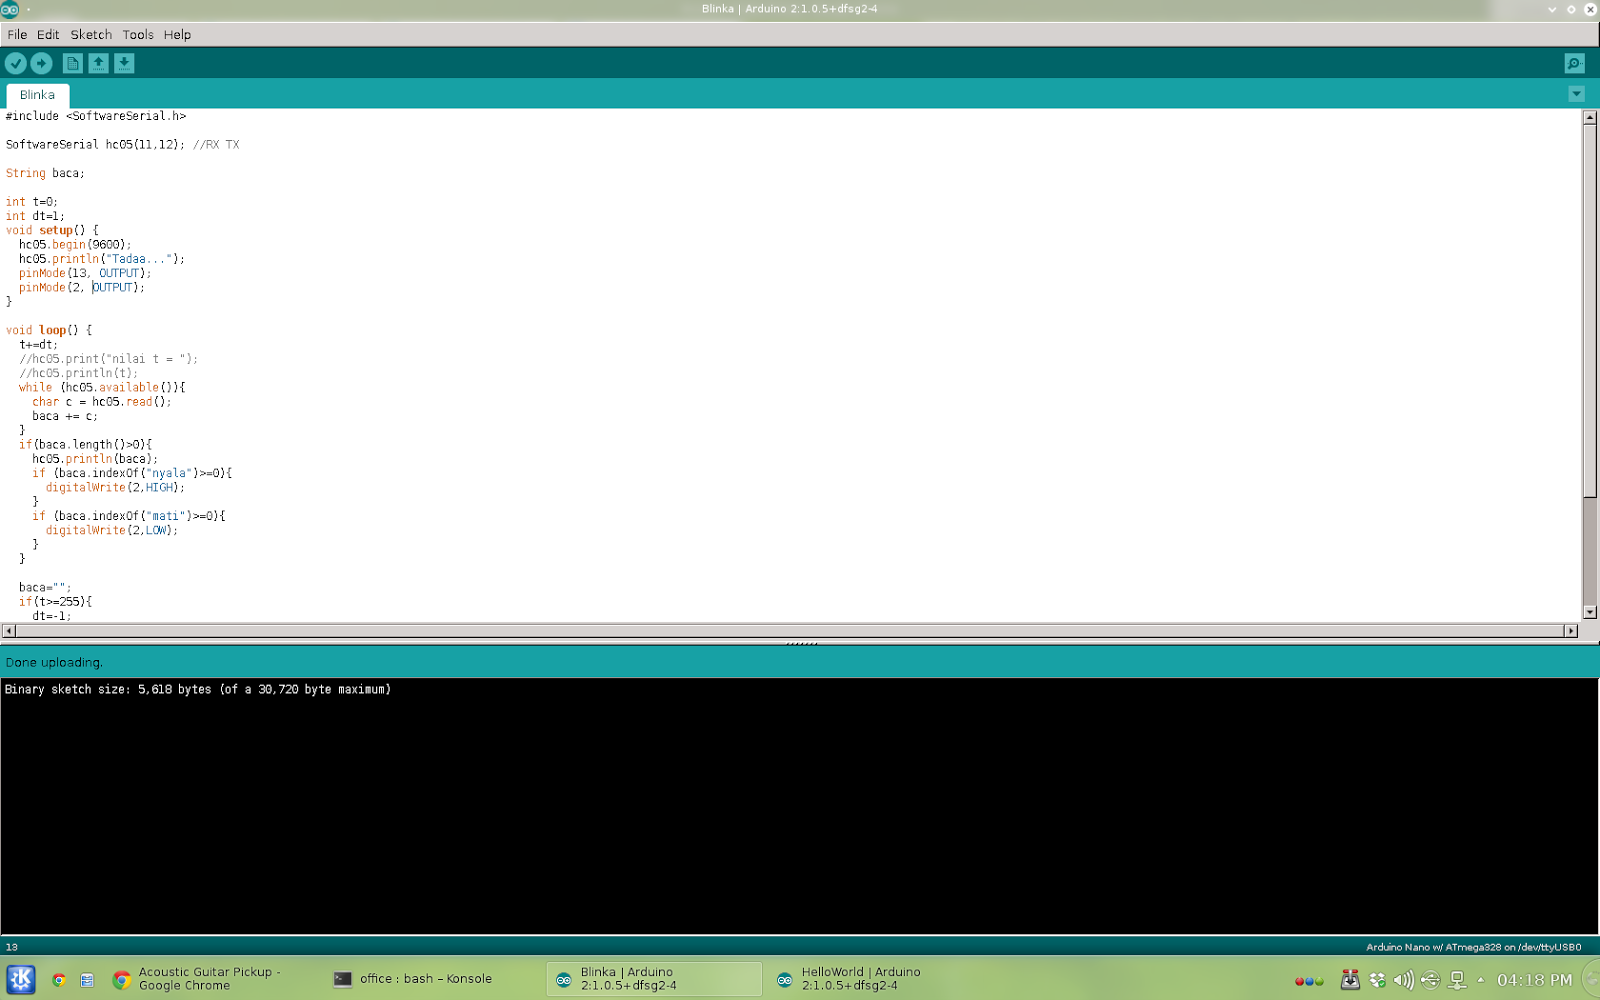
Create the file main.c, a code to blink LED on Port B0. (Okay, it's not assembly yet, just to test if my minimal system works, will do in assembler next)
#include <avr/io.h>
#include <util/delay.h>

/*

Blinks an LED connected to pin B0.

Assumes the positive pin of the LED is connected to B0.
The negative pin is connected through a resistor to GND.

A 1K resistor works well for most LEDs.
Decrease if too dim.

*/

int main(void) {
    DDRB = 255U; // Make all PB* -- PORT B -- pins output
    PORTB = 0x0// turn all PB* -- PORT B -- pins off.
    
    while (1) {
        PORTB = 0x1// high 
        _delay_ms(250);  // 1/4 second on
        PORTB = 0X0// low
        _delay_ms(2500); // 2.5 seconds off
    }

}


create the Makefile

PRG            = main
OBJ = main.o
PROGRAMMER = usbasp
PORT = usb
MCU_TARGET = attiny13
AVRDUDE_TARGET = attiny13
OPTIMIZE = -Os
DEFS =
LIBS =

HZ = 9600000


CC = avr-gcc


override CFLAGS = -g -DF_CPU=$(HZ) -Wall $(OPTIMIZE) -mmcu=$(MCU_TARGET) $(DEFS)
override LDFLAGS = -Wl,-Map,$(PRG).map

OBJCOPY = avr-objcopy
OBJDUMP = avr-objdump

all: $(PRG).elf lst text #eeprom

$(PRG).elf: $(OBJ)
$(CC) $(CFLAGS) $(LDFLAGS) -o $@ $^ $(LIBS)

clean:
rm -rf *.o $(PRG).elf *.eps *.png *.pdf *.bak *.hex *.bin *.srec
rm -rf *.lst *.map $(EXTRA_CLEAN_FILES)

lst: $(PRG).lst

%.lst: %.elf
$(OBJDUMP) -h -S $< > $@

text: hex bin srec

hex: $(PRG).hex
bin: $(PRG).bin
srec: $(PRG).srec

%.hex: %.elf
$(OBJCOPY) -j .text -j .data -O ihex $< $@

%.srec: %.elf
$(OBJCOPY) -j .text -j .data -O srec $< $@

%.bin: %.elf
$(OBJCOPY) -j .text -j .data -O binary $< $@


eeprom: ehex ebin esrec


ehex: $(PRG)_eeprom.hex
esrec: $(PRG)_eeprom.srec

%_eeprom.hex: %.elf
$(OBJCOPY) -j .eeprom --change-section-lma .eeprom=0 -O ihex $< $@


%_eeprom.bin: %.elf
$(OBJCOPY) -j .eeprom --change-section-lma .eeprom=0 -O binary $< $@


install: $(PRG).hex
avrdude -p $(AVRDUDE_TARGET) -c $(PROGRAMMER) -P $(PORT) -v \
-U flash:w:$(PRG).hex

(note: although we use ATTiny13A, we have to declare it as ATTiny13 or it won’t upload :) )
compile it

Nugrohos-MacBook-Air:ATTiny nugroho$ make
avr-gcc -g -DF_CPU=9600000 -Wall -Os -mmcu=attiny13     -c -o main.o main.c
avr-gcc -g -DF_CPU=9600000 -Wall -Os -mmcu=attiny13   -Wl,-Map,main.map -o main.elf main.o 
avr-objdump -h -S main.elf > main.lst
avr-objcopy -j .text -j .data -O ihex main.elf main.hex
avr-objcopy -j .text -j .data -O binary main.elf main.bin
avr-objcopy -j .text -j .data -O srec main.elf main.srec

Nugrohos-MacBook-Air:ATTiny nugroho$
upload it to ATTiny13 using make install

Nugrohos-MacBook-Air:ATTiny nugroho$ make install
avrdude -p attiny13 -c usbasp -P usb -v  \
         -U flash:w:main.hex

avrdude: Version 6.0.1, compiled on Dec 16 2013 at 17:26:24
         Copyright (c) 2000-2005 Brian Dean, http://www.bdmicro.com/
         Copyright (c) 2007-2009 Joerg Wunsch

         System wide configuration file is "/usr/local/CrossPack-AVR-20131216/etc/avrdude.conf"
         User configuration file is "/Users/nugroho/.avrduderc"
         User configuration file does not exist or is not a regular file, skipping

         Using Port                    : usb
         Using Programmer              : usbasp
         AVR Part                      : ATtiny13
         Chip Erase delay              : 4000 us
         PAGEL                         : P00
         BS2                           : P00
         RESET disposition             : dedicated
         RETRY pulse                   : SCK
         serial program mode           : yes
         parallel program mode         : yes
         Timeout                       : 200
         StabDelay                     : 100
         CmdexeDelay                   : 25
         SyncLoops                     : 32
         ByteDelay                     : 0
         PollIndex                     : 3
         PollValue                     : 0x53
         Memory Detail                 :

                                  Block Poll               Page                       Polled
           Memory Type Mode Delay Size  Indx Paged  Size   Size #Pages MinW  MaxW   ReadBack
           ----------- ---- ----- ----- ---- ------ ------ ---- ------ ----- ----- ---------
           eeprom        65     5     4    0 no         64    4      0  4000  4000 0xff 0xff
           flash         65     6    32    0 yes      1024   32     32  4500  4500 0xff 0xff
           signature      0     0     0    0 no          3    0      0     0     0 0x00 0x00
           lock           0     0     0    0 no          1    0      0  4500  4500 0x00 0x00
           calibration    0     0     0    0 no          2    0      0     0     0 0x00 0x00
           lfuse          0     0     0    0 no          1    0      0  4500  4500 0x00 0x00
           hfuse          0     0     0    0 no          1    0      0  4500  4500 0x00 0x00

         Programmer Type : usbasp
         Description     : USBasp, http://www.fischl.de/usbasp/

avrdude: auto set sck period (because given equals null)
avrdude: warning: cannot set sck period. please check for usbasp firmware update.
avrdude: AVR device initialized and ready to accept instructions

Reading | ################################################## | 100% 0.00s

avrdude: Device signature = 0x1e9007
avrdude: safemode: lfuse reads as 6A
avrdude: safemode: hfuse reads as FF
avrdude: NOTE: "flash" memory has been specified, an erase cycle will be performed
         To disable this feature, specify the -D option.
avrdude: erasing chip
avrdude: auto set sck period (because given equals null)
avrdude: warning: cannot set sck period. please check for usbasp firmware update.
avrdude: reading input file "main.hex"
avrdude: input file main.hex auto detected as Intel Hex
avrdude: writing flash (88 bytes):

Writing | ################################################## | 100% 0.08s

avrdude: 88 bytes of flash written
avrdude: verifying flash memory against main.hex:
avrdude: load data flash data from input file main.hex:
avrdude: input file main.hex auto detected as Intel Hex
avrdude: input file main.hex contains 88 bytes
avrdude: reading on-chip flash data:

Reading | ################################################## | 100% 0.05s

avrdude: verifying ...
avrdude: 88 bytes of flash verified

avrdude: safemode: lfuse reads as 6A
avrdude: safemode: hfuse reads as FF
avrdude: safemode: Fuses OK (H:FF, E:FF, L:6A)

avrdude done.  Thank you.

Nugrohos-MacBook-Air:ATTiny nugroho$

And we're good to go


Setelah beberapa sukses dengan Aarduino pro mini dan nano (keduanya menggunakan ATMega328), saya tertarik dengan  memprogram beberapa chip menggunaka bahasa assembly (atau assembler). Tentu saja kita bisa menggunakan arduino untuk melakukan itu namun saya ingin merasakan pemrograman asembler dengan cara klasik, menggunakan sistem minimal dan upload manual, :)

(di post ini saya masih menggunakan c untuk mengetes bahwa sistem telah bekerja, dapat mengupload hex file)

Jadilah saya memakai ATTiny13A, ISP programmer atau downloader SPI palsu, USBASP. Yang ini hampir lupa karena saya pikir telah punya PL2303HX ,USB-To-TTL yang biasa saya gunakan untuk mengupload sketch arduino, dengan pin vcc-gnd-tx-rx.

Ternyata USB-to-TTL saya memang berguna juga karena USBASP saya tak bisa memberi tegangan 5v ke sistem minimal, hanya dapat digunakan untuk upload file hex ke ATTiny13A.

Tak perlu driver, OS X telah mendeteksi USBASP saya secara otomatis

Wednesday, May 6, 2015

Adding Analog Sensor on My Arduino Nano LCD Project

 I add the code from previous project so it could read analog sensor from pin A0 and display it on second row LCD.

I use a potentiometer to emulate the sensor.

 So as result, this ATMEGA328 based device could:
- read digital sensor from pin 7, display it on second rowLCD
- if pin 7 is high, LED connected to pin 10 will turned on, otherwise it'll turned off
- communicate via bluetooth using dedicated serial port (RX= 8 , TX = 9)
- write any string sent from bluetooth to first row LCD
- read string length sent from bluetooth, display it on second row LCD.
- embedded LED connected to pin 13 is on if there's bluetooth serial communication


#include <SoftwareSerial.h>
#include <LiquidCrystal.h>
.
SoftwareSerial mySerial(8, 9); // RX, TX
int t=1;
int i=1;
LiquidCrystal lcd(12, 11, 5, 4, 3, 2);//rs e d4 d5 d6 d7
String tulisan = "Tadaa..., heheh...., hihihi :)";
String info =":)";
void setup() {
pinMode(7,INPUT);
pinMode(6,OUTPUT);
pinMode(10,OUTPUT);
pinMode(13,OUTPUT);
lcd.begin(16, 2);
lcd.print(tulisan);
mySerial.begin(9600);
Serial.begin(9600);//port serial resmi
delay(1000);
}


void loop() {
//lcd.clear();
if (digitalRead(7)==1){
digitalWrite(10,HIGH);
}else{
digitalWrite(10,LOW);
}
if (mySerial.available()){
digitalWrite(13,HIGH);
while(mySerial.available()>0){
t=1;
lcd.clear();
tulisan=mySerial.readString();
mySerial.println(tulisan);
}
}
lcd.setCursor(1,0);
lcd.print(tulisan);
int l= tulisan.length()-12;
info ="P7=";
info+=digitalRead(7);
info+=",l=";
info+=tulisan.length();
info+=",a=";
info+=analogRead(A0);
lcd.setCursor(t,1);
lcd.print(info);
digitalWrite(13,LOW);
if (l>16){
lcd.scrollDisplayLeft();
t++;
if (t>=l){
t=1;
lcd.clear();
}
}
delay(1000);
}
//PWM: 3, 5, 6, 9, 10, and 11

.


here my fritzing sketch (couldn't found the HC05 bluetooth module on partlist, :) )


Saya tambah dari proyek sebelumnya sehingga dapat membaca sensor analog dari pin A0 dan menampilkannya di LCD baris kedua.

Saya menggunakan potensiometer untuk mewakili sensornya.

Jadi, hasil akhir dari proyek ini adalah sebuah alat berbasis ATMega328 yang dapat:
- membaca sensor digital dari pin 7 dan menampilkannya di baris kedua LCD
- jika pin 7 high, LED yang terhubung ke pin 10 akan menyala, jika tidak LED tetap padam
- berkomunikasi via bluetooth menggunakan port serial tersendiri (RX=8, TX=9)
- menulis sebarang string yang dikirim dari bluetooth ke baris pertama LCD
- membaca panjang string yang dikirim lewat LCD dan menampilkannya di baris kedua LCD
- LED di board yang terhubung ke pin 13 menyala jika ada komunikasi serial via bluetooth


Thursday, April 30, 2015

Scrolling LCD 16x2 First Row Only

 It's tricky but not impossible

 All I have to do is update the cursor position of second row so it seems still. :)


#include <SoftwareSerial.h>
#include <LiquidCrystal.h>

SoftwareSerial mySerial(8, 9); // RX, TX
int t=1;
int i=1;
LiquidCrystal lcd(12, 11, 5, 4, 3, 2);//rs e d4 d5 d6 d7
String tulisan = "Tadaa..., heheh...., hihihi :)";
String info =":)";
void setup() {
pinMode(7,INPUT);
pinMode(6,OUTPUT);
pinMode(10,OUTPUT);
pinMode(13,OUTPUT);
lcd.begin(16, 2);
lcd.print(tulisan);
mySerial.begin(9600);
delay(1000);
}


void loop() {
//lcd.clear();
if (digitalRead(7)==1){
digitalWrite(10,HIGH);
}else{
digitalWrite(10,LOW);
}
if (mySerial.available()){
digitalWrite(13,HIGH);
while(mySerial.available()>0){
tulisan=mySerial.readString();
mySerial.println(tulisan);
}
}
lcd.setCursor(1,0);
lcd.print(tulisan);
//scroll first row if text length's beyond 16
int l= tulisan.length()-12;
info ="P7=";
info+=digitalRead(7);
info+=",l=";
info+=tulisan.length();
lcd.setCursor(t,1);
lcd.print(info);
digitalWrite(13,LOW);
lcd.scrollDisplayLeft();
t++;
if (t>=l){
t=1;
lcd.clear();
}
delay(1000);
}
//PWM: 3, 5, 6, 9, 10, and 11

.

Agar output LCD hanya bagian atas saja yang scroll sedangkan yang baris kedua tetap diam.

Triknya adalah memberi LCD perintah scroll seperti biasa di arduino namun kita mengupdate posisi kursor di baris kedua agar tulisan selalu nampak di layar (dalam hal ini adalah string bernama 'info')

Read Digital Pin and Serial Message, Display it on LCD using Arduino

 In addition of my previous tinkering with LCD on arduino nano, I add a chunk of program to display the state of digital pin 7 on second row LCD.

I also remove the scroll command, package it as separate function but not called. I plan to using another scrolling method, some code without delay. (had it in mind, but still lazy to coding it, maybe next)


#include <softwareSerial.h>
#include<liquidCrystal.h>
SoftwareSerial mySerial(8, 9); // RX, TX

LiquidCrystal lcd(12, 11, 5, 4, 3, 2);//rs e d4 d5 d6 d7
String tulisan = "Tadaa...";
String info =":)";
void setup() {
pinMode(7,INPUT);
pinMode(6,OUTPUT);
pinMode(10,OUTPUT);
pinMode(13,OUTPUT);
lcd.begin(16, 2);
lcd.print(tulisan);
mySerial.begin(9600);
delay(1000);
}


void loop() {
if (digitalRead(7)==1){
digitalWrite(10,HIGH);
}else{
digitalWrite(10,LOW);
}
if (mySerial.available()){
lcd.clear();
digitalWrite(13,HIGH);
while(mySerial.available()>0){
lcd.setCursor(0,0);
tulisan=mySerial.readString();
mySerial.println(tulisan);
lcd.print(tulisan);
}
}

//scLeft();
//scRight();
//scDef();
info ="Pin7 = ";
info+=digitalRead(7);

lcd.setCursor(0,1);
lcd.print(info);
digitalWrite(13,LOW);
delay(1000);
}

void scLeft(){
for (int i = 0; i < tulisan.length(); i++) {
lcd.scrollDisplayLeft();
delay(150);
}
}

void scRight(){
for (int i = 0; i < (tulisan.length()+16); i++) {
lcd.scrollDisplayRight();
delay(150);
}
}

void scDef(){
for (int i = 0; i < 16; i++) {
lcd.scrollDisplayLeft();
delay(150);
}
}
//PWM: 3, 5, 6, 9, 10, and 11


.


Menulis perintah ke baris pertama LCD via bluetooth, baris kedua digunakan untuk mengecek pin 7 (digital). Fitur scrill (di post sebelumnya dihilangkan, ada di bawah sebagai function tetapi tak dipanggil di program utama)


Monday, April 27, 2015

Displaying and Scrolling Text Typed via Serial Monitor on Arduino Nano

 Here we go. The challenge is reading serial data and store it in string, but fortunately there is readString command, :)

(I take the shoot from Photo Booth on my Mac)


#include <LiquidCrystal.h>

.
LiquidCrystal lcd(12, 11, 5, 4, 3, 2);//rs e d4 d5 d6 d7
String tulisan = "Tadaa...";
void setup() {
lcd.begin(16, 2);
lcd.print(tulisan);
Serial.begin(9600);
delay(1000);
}

void loop() {
if (Serial.available()){
lcd.clear();
while(Serial.available()>0){
tulisan=Serial.readString();
lcd.print(tulisan);
}
}
// scroll 13 positions (string length) to the left
// to move it offscreen left:
for (int i = 0; i < tulisan.length(); i++) {
// scroll one position left:
lcd.scrollDisplayLeft();
// wait a bit:
delay(150);
}

// scroll 29 positions (string length + display length) to the right
// to move it offscreen right:
for (int i = 0; i < (tulisan.length()+16); i++) {
// scroll one position right:
lcd.scrollDisplayRight();
// wait a bit:
delay(150);
}

// scroll 16 positions (display length + string length) to the left
// to move it back to center:
for (int i = 0; i < 16; i++) {
// scroll one position left:
lcd.scrollDisplayLeft();
// wait a bit:
delay(150);
}

// delay at the end of the full loop:
delay(1000);

}

.


Menampilkan dan men-scroll text yang diketik menggunakan monitor serial di arduino nano.

Tantangannya adalah membaca serial data dan menyimpannya sebagai string. Di versi lama, kita harus membaca komunikai serial sebagai char yang tentu saja sangat merepotkan. Untungnya kita mempunyai perintah readString, :)

Arduino Nano Clone on OS X Yosemite

 After subconsciously try it on my debian machine about a week, now when I have a chance to write on arduino IDE on my Macbook, it wont upload the sketch, no port for nano.

installing FTDI driver didn't help because it use CH340G chip for com.

Grab the driver from http://www.wch.cn/downloads.php?name=pro&proid=178

install it

restart,

no change, :(

found out that we have to run this on terminal

sudo nvram boot-args="kext-dev-mode=1"

reboot,

yup, the life is easier again, :)


Thursday, April 23, 2015

Mengirim Perintah ke Arduino Nano via Bluetooth

Menggunakan HC-05

Arduino Nano

Menyalakan LED 13 (blink tanpa delay)

Menyalakan LED 3 dengan mode PWM dengan perintah analogRead, sehingga nyala LED berangsur-angsur dari redup ke terang ke redup lagi (255 tingkat kecerahan).

Menyalakan LED 2 dengan perintah  melalui port serial bluetooth dari Mac OS X.

(program ditulis dan dijalankan di linux Debian)

led pin 3 dapat dinyalakan (setelah microcontroler tersambung dengan komputer via bluetooth) dengan mengetikkan 'nyala' atau 'mati' pada konsole di komputer.


#include <softwareserial .h>

SoftwareSerial hc05(11,12); //RX TX

String baca;

int t=0;
int dt=1;
void setup() {
hc05.begin(9600);
hc05.println("Tadaa...");
pinMode(13, OUTPUT);
pinMode(2, OUTPUT);
}

void loop() {
t+=dt;
//hc05.print("nilai t = ");
//hc05.println(t);
while (hc05.available()){
char c = hc05.read();
baca += c;
}
if(baca.length()>0){
hc05.println(baca);
if (baca.indexOf("nyala")>=0){
digitalWrite(2,HIGH);
}
if (baca.indexOf("mati")>=0){
digitalWrite(2,LOW);
}
}

baca="";
if(t>=255){
dt=-1;
digitalWrite(13, LOW);
}
if(t<=0){
dt=1;
digitalWrite(13,HIGH);
}
analogWrite(3,t);
delay(27);
}
      

.


Wednesday, April 15, 2015

Fritzing, One Stop Apps for MicroController

We could write code in it, connecting parts on breadboard (or project-board), auto-route it to schematic and pcb layout (single or double layer).

It has several arduino board ready on parts section


Dengan Fritzing, kita bisa menulis kode mikrocontroler di sini, memasang komponen dan menyambung dengan kabel di project-board, kemudian me-route secara otomatis menjadi skematik seperti di EWB (Electronic Work Bench), routing otomahis juga dilakukan untuk menghasilkan layout PCB seperti di Protel (mendukung single dan double-layer)

Saturday, April 11, 2015

Blink Without Delay Problem on Arduino

Well, not for all, but for me it becomes problem while turning led on using analogWrite command, some led just won’t completely shut down.

(Maybe it completely unrelated, but my analog reading on A0 is oscillating, very unstable)


I have the commands packed on a function

unsigned long t0 = 0;
const long dt = 1000;
void blinkNoD(int pin) {
unsigned long t = millis();
if(t - t0 >= dt) {
t0 = t;
led=!led;
digitalWrite(pin, led);
}
}


Since I already have delay in loop, and it really messed with the timing (not mention that maybe the analog reading instability have anything to do with it), I decided to modify the blink code, still without delay command.

unsigned long t0 = 0;
const long dt = 1;
void blinkNoD(int pin) {
t0 += dt
if(t0 >= 4) {
t0 = 0;
led=!led;
digitalWrite(pin, led);
}
}

It turned out that my analogRead instability is another problem, get to work on it, :)


Thursday, April 9, 2015

Sensor Analog di Arduino, dengan monitor via bluetooth

KProgram ini digunakan untuk melihat nilai sensor (berupa tegangan) di port analog 0 (A0) di ATMega328.

Di sini sensor diwakili oleh potensiometer yang kaki tepinya masing-masing dihubungkan ke vcc dan ground, kaki tengah dihubungkan ke port analog 0.

Microcontroler membaca port analog 0 yang nilainya kemudian dikirimkan secara serial via bluetooth, juga untuk menyalakan empat led sesuai dengan nilai pembacaan sensor.

Karena ATMega328 memliliki resolusi pembacaan analog sebesar 10-bit, maka led diset sedemikian sehingga led 1 menyala jika nilai kurang dari 255, led 1 dan 2 menyala jika nilai sensor antara 255 dan 512, dst.

Sebagai tambahan, perintah yang digunakan untuk menyalakan led adalah analogWrite() bukan digitalWrite() sehingga meski nilai sensor kurang dari 255, kita masih bisa membedakan levelnya dengan tingkat redup-terangnya led pertama (0 mati, 50 redup, 255 nyala terang).


I also use it to blink led without delay, fade without delay, write to serial via Bluetooth module (HC-05) AND USB-to-TTL.

Notice that I have two TX and two RX, the default pin (0 and 1) for usb communication (upload sketch and debugging), the software serial TX,RX (pin 8 and 7) is used for bluetooth communication.


Here the code.  I use some function to isolate some group of commands for easy debugging.

#include <softwareserial .h>

SoftwareSerial mySerial(8, 7); // RX, TX

int led = LOW;
int dterang = 5;
int terang = 11;
unsigned long t0 = 0;
const long dt = 1000;

void setup() {
setupSerial();
pinMode(13, OUTPUT);

}

void loop() {
fadeLed(5);
blinkNoD(13);
adcToLed(0);
bacaAnalog(0);
delay(100);
}

void adcToLed(int pin){//3,9,10,11
int nilai = analogRead(pin);
int sisa = nilai % 256;
if (nilai<256 data-blogger-escaped--1="" data-blogger-escaped-512="" data-blogger-escaped-768="" data-blogger-escaped-analogwrite="" data-blogger-escaped-dterang="" data-blogger-escaped-else="" data-blogger-escaped-fadeled="" data-blogger-escaped-if="" data-blogger-escaped-int="" data-blogger-escaped-nilai="" data-blogger-escaped-pin="" data-blogger-escaped-sisa="" data-blogger-escaped-terang="" data-blogger-escaped-void="">=255 ){
terang = 255;
dterang *= -1;
}
analogWrite(pin, terang);
}

void blinkNoD(int pin) {
unsigned long t = millis();
if(t - t0 >= dt) {
t0 = t;
led=!led;
digitalWrite(pin, led);
}
}

void bacaAnalog(int pin) {
int sensor = analogRead(pin);
mySerial.print("Pin ");
mySerial.print(pin);
mySerial.print(" bernilai ");
mySerial.println(sensor);
Serial.println("Output dilewatkan port serial via bluetooth");
delay(10);
}

void setupSerial(){
Serial.begin(9600);
Serial.println("Hello, world? Ini kabel");
mySerial.begin(9600);
mySerial.println("Hello, world? Ini bluetooth");
}
/*
PWM: 3, 5, 6, 9, 10, and 11.
PI: 10 (SS), 11 (MOSI), 12 (MISO), 13 (SCK)
Serial: 0 (RX) and 1 (TX)
*/
.


Monday, April 6, 2015

Arduino with HC05 Bluetooth Module on OS X Yosemite

Got HC05 Bluetooth Module last Saturday at electronic store, connect it with my Arduino Pro Mini (ATMega 328 based) the usual way: tx—rx, rx—tx, vcc—5v and ground—0v. Powered it on alongside the Pro Mini. The led indicator blinked, good sign, :)

Pairing with my Mac is easy, but make sure the pairing code is 1234, mac use 0000 as default code. If paired successfully the led blink pattern will change. 

Open the serial monitor and, nothing appeared, :(

Maybe the IDE busy so I open the OS X terminal and access using screen:

$screen /dev/cu.HC-05-DevB 

Still nothing happened. 

Unplug all the cable, plug it again. And yup, there’s serial output (using Arduino IDE serial monitor or screen command on terminal )

I have a Mac with Yosemite.
Apparently, most of my problem with arduino board is loose cable connection, :)


323f (5) amp (1) android (12) apple (7) arduino (18) art (1) assembler (21) astina (4) ATTiny (23) blackberry (4) camera (3) canon (2) cerita (2) computer (106) crazyness (11) debian (1) delphi (39) diary (286) flash (8) fortran (6) freebsd (6) google apps script (8) guitar (2) HTML5 (10) IFTTT (7) Instagram (7) internet (12) iOS (5) iPad (6) iPhone (5) java (1) javascript (1) keynote (2) LaTeX (6) lazarus (1) linux (29) lion (15) mac (28) macbook air (8) macbook pro (3) macOS (1) Math (3) mathematica (1) maverick (6) mazda (4) microcontroler (35) mountain lion (2) music (37) netbook (1) nugnux (6) os x (36) php (1) Physicist (29) Picture (3) programming (189) Python (109) S2 (13) software (7) Soliloquy (125) Ubuntu (5) unix (4) Video (8) wayang (3) yosemite (3)